The very common smoky corrugated sheet-iron kitchen with its ”three stone” stoves has some good properties: low cost, easy maintenance, gives a fair amount of light, tolerant of various firewood shapes and sizes (even the smoke can be of value for preserving thatched roofs).
But the smoke irritates both eyes and lungs and they are not especially effective. While visiting my In-laws in Gatore, Kibungo, Rwanda in March 1999, I hoped I would be able to do something to improve the kitchen (and water supply and toilet)
Other peoples examples I’ve seen
I had seen drawings and video sequences about simple clay-sand stoves which lead the fire past 2 or more pots. But I hadn’t made or seen one ”live”. I asked about if there were any in the area.
One response lead to a chimneyless baking oven which didn’t seem to be used. Another response lead to a nearby dispensary (in Kirehe). The nicely built dispensary had beautifully finished woodstoves built in pairs at a nice height in 3 or 4 places, for relatives to use when preparing food for patients. Though built in 1978, they seemed to have been almost unused. They apparently used too much firewood. The fire passes only under one pot and the opening for wood and air could not be closed. The tall chimneys probably took away all the smoke, but probably also took most of the heat, so it didn’t reach the pot which was unnecessarily high above the fire.

An earlier experience (Tanzania 1989) of well-meant attempts to use a chimney to free women from a smokey Hell was to be found in the house of a cabinet minister. The kitchen was planned to be IN the house and a BIG chimney (about 1 square meter) was made over the iron grate where the pots were to be above the wood fire. Though it seemed unnecessarily expensive and not able to control like a more closed-in fire, I would have thought that it would have at least taken away the smoke. But it apparently didn’t (not enough anyhow), so they had set up a corrugated iron shed with 3 stone stoves out behind the house. It was, as usual, blackened with smoke.

I had also seen that a traditional iron woodstove from Sweden (at a Lutheran mission) could work well even in Africa with a chimney of usual dimensions (10-15 cm square cross-section hole).
What I did
We had ordered a couple truckloads of sand, which were to come ”any day”. Time was running out so we bought a couple wheel-barrow loads of sand.
I didn’t want to cut holes in the roofing for my untried prototype stove. I wanted to start with the chimney because once I started making the stove in the ”kitchen”, I would be in the way for the usual kitchen work and the new stove wouldn’t be able to be used until a chimney was made.
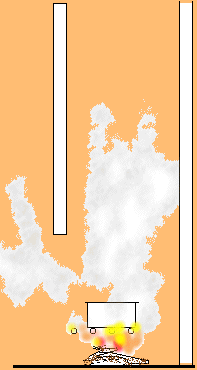
We had about a 120 bricks (19*10*6,5cm) that I wanted to use for the chimney. Father-in-law had also raised the roof some to the cooking shed. I had to try to raise the chimney some if it was to reach at least above the shed roofing. One of the young fellows helped me pile up a mound of clayey earth as a raised base to start from (about 25 cm above ground). I used a piece of banana ”trunk” with a 13cm diam as form for the smoke channel from the kitchen out to the bottom of the chimney. The top part of the channel was redclay (domed over the banana stem) reinforced with a zigzag of sisal rope. I laid the bricks using ordinary mud (clayey but not the deeper red clay) with about 1 cm thick joints. I had no spirit level but tried to keep things level by checking each course with a basin with a little water. After getting up about 60 cm, it was obvious that the bricks were sinking some in the ”foundation”. We put in an extra pole to support the chimney and hung a plumbline to try to straighten up the rest of the chimney. The ugliest bricks wound up in the top courses. The very top was 4 bricks on end (with red clay to hold them) so the chimney would get up over the edge of the tin roof.
The chimney got quite a lot of cracks when the clay mortar dried. It should be plastered (or made) with lime mortar to prevent cracking and rain damage.
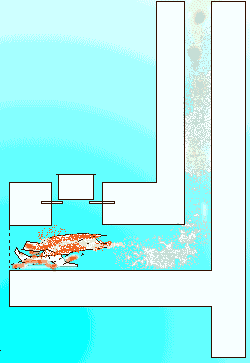
The family had the simple spun aluminum pots that are common in Tanzania and Rwanda. They had many different diameters (20, 22, 25 30 33 & 36,5 cm) with corresponding different heights. Most had (originally) flat bottoms. Stoves where the flames go around the sides of the pot have the potential to reach higher efficiency than ones that just let flames touch the bottom of the pots. But stoves that pots go down into are difficult to use with different sized pots. I drew a plan for a stove with 3 holes. The largest hole with 28cm diameter is directly above the fire. The other 2 holes, with 18 cm diameter, are in series from the largest hole to the chimney. The 2 largest pots would be able to be used on the largest hole. Smaller pots could be accommodated there with the help of a ceramic ring (o.d=30cm, i.d=18-20cm). All pots could be used on the smaller holes.
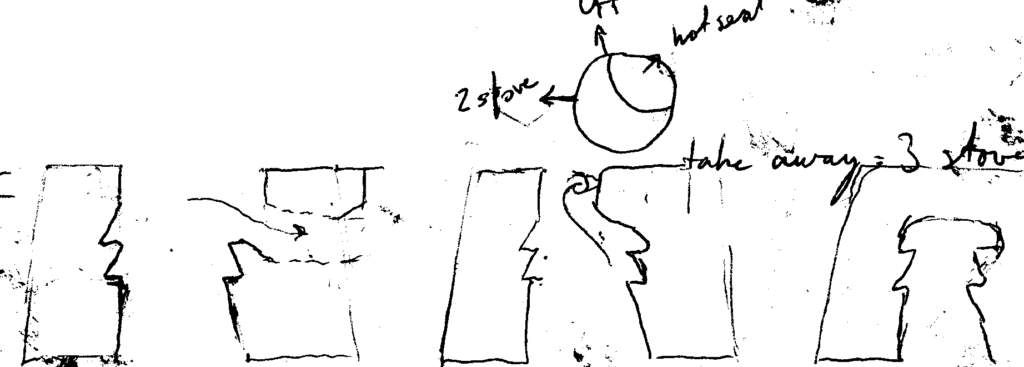
The increased draft of a chimney has been seen in many cases to lead to greater wood consumption. Also in some places where the heat from the cooking fire to the room has been wanted, enclosing the fire has been counterproductive on that count. [An enclosed fire also unfortunately gives no light to the room.] To be able to limit excessive draft and save heat for the room, I therefore in my plan included an extended smoke channel extending in a loop from the bottom of the third pot hole and back to the top of the same hole. A specially formed plug could be put into the third pot hole, when not needing 3 pots, to control the flow of combustion gases. ”2 pot” position would send gases direct to chimney when starting or not wanting more kitchen heat. ”Hot seat” would block the shortcut to the chimney so the hot gases would have to go the circuit under the ”hot seat”. This would also decrease excessive draft. The hot seat would give extra heat to the room (or cook!) or be used to dry things (firewood, crops) on it (or in holes which I didn’t wind up making). ”Off” would block the passage to the chimney to help maintain heat in the stove after using. (This makes also makes lighting the stove easier in the morning.)

Other parts of the plan were:
- flat sloping front so air-wood inlet could be easily closed off with a flat slab
- small horizontal ridges along sides above fireroom where grill pins could be placed (below big pot) (1 ridge was made in the constructed prototype)
- wall extension in under the middle of big pothole: it would force combustion gases to swirl along pot bottom rather than take shortcut toward chimney. (in the constructed prototype it was also used to support smaller pots with brick pieces placed around them).
- Roast pipe between hole 2 & 3 (was not made in the constructed prototype. I didn’t have any pipe or suitable can.)
- Several holes (not connected to the smoke passage) that would be used for drying firewood. (was not implemented because of time-stress)
- A drying +secondary air hole going in from the front under hole 2. It was to have 2 preheated air channels leading back into the fireroom. Though I hadn’t decided if it should go in toward the bottom (to be sure to participate in the fire) or go in somewhat higher (to encourage total combustion). I wound up skipping this entirely. This left a large space below hole 2. This could be used for roasting corncobs or firing simple ceramics. If not used, some bricks were placed there to see that the gases were forced to pass close to pot on hole 2.
- What this DOESN’T have is an insulated combustion chamber like a ”rocket stove” has. That would improve heat production and reduce smoke.
For the stove to work properly, the pots needed to have their bottoms flattened. A 10cm tree trunk sawed off at a right angle served as a good anvil. A carpenter’s hammer (without sharp edges on the striking face) was applied with relatively light hammering, starting along the outer edge of the bottom and working concentrically inward. (A common mistake is to try to pound down the highest spot first. This usually leads to wrinkles and cracks)
The day after making the chimney, I was going to start on the actual stove. Father-in-law said there were a lot of broken bricks in the ruins of his brothers house which was destroyed during the genocide. I wish I had known about them when making the foundation. I welcomed the opportunity to use them, because time was running out and I didn’t have a tested plan to build by and wanted to be able to try my design without allowing its clay to dry as much as would be suitable. Using burned bricks as the inner structure would allow me to try the prototype quickly. We collected 2-3 wheelbarrows of brick pieces and piled in 3 piles: almost full-length, about ½ length, small.
I tried to follow the basic plan using brickpieces and mortaring with redclay. The parts where I had to build outcropping or forming arches were made with redclay+sand+pieces of sisal fiber. This was mainly around all the pot-holes, the front face around the firewood entrance, the arch over the firewood entrance. I used a piece of concrete slab as the top of the ”hotseat”. Because I wanted to try to make a rotatable ”valve” plug for hole 3, I used a (truncated) conical pot as a form for the hole there. Then I used the pot as a form for the plug. The plug was only clay+sand+fiber (and turned out very well, because I gave it time to dry properly before exposing to fire). But it fitted all-too loosely into hole 3, which hadn’t shrunk as much because it was 80% fired brick. (the pure red-clay, relatively dry but plastic, shrinks 7,5% on sundrying (+½% on soft firing))
The stove construction took a day plus some hours.
With only one day of drying, we made a small fire in the stove after making a small fire at the back of the 3rd hole (near the chimney) to start some draft. There were a lot of cracks in both the chimney and the stove itself, so I was afraid it wouldn’t take out the smoke. The first day it took quite a while before the smoke went out properly. (We had a small fire and the clay was still quite damp.)
Even the second day, I was disappointed in the draft. It had expected it to be much stronger. This meant that the stove took a while before it drew out the smoke well. It also meant that the intensity of the fire seemed lower than I had expected. I was afraid that the stove was slower than the 3-stone ones they used to use. They said it was faster, but I was afraid they might say that to ”not insult me” (when I’ve been trying so hard to help). But they were using it in spite of the differences (in use compared to a 3 stone stove) and in spite of only having it for a few days.
Because the pots were only in contact with the flames with their bottom surface, I was worried that the stove would be slow, so I made some clay lid-weight-insulators to put on the aluminum trays which were used as lids on the pots.
On Tuesday before we left I made a few notes on the speed of the stove. A large pot (30cm diam?) was filled to about 3cm from top with water (probably 25C and about 10 liter). 15 minutes after lighting the fire the water was about 50C. 60 minutes after lighting the water had boiled and Ugali (stiff maize porridge) had been made. A smaller pot with about 2 liters of water had also boiled on the second hole.
The actual cad drawing file: 3potstov.dxf
This is presented in the hope that there maybe something useful it in in spite of the lack of proper preparation and documentation. Since coming home I´ve been searching Internet for some sites that could be useful: CREST ikweb Stoves homepage
If I were to make a stove today (May 11, 2000) I would try using the principles of the ”rocket” stove: Have a well insulated combustion chamber (with wood ash around it for insulation) and some preheating of primary combustion air. The high temperature which is quickly attained is reputed to give such good combustion that even without a chimney there is no smoke. As well as having a high efficiency and speed.
Below is a collection of various sketches I have made while planning, making, remembering this stove.


